

I'd like to begin by pointing out that there is not a huge crotch area on these leggings. But we're working out something for toddlers here, their legs pretty much rub together anyways, at least mine's do. Plus we're doing stretchy leggings, not blue jeans, so I've found it doesn't matter. However I don't know that this would translate well to kids out of the diaper stage.

(cuffed variation - see bottom for special instructions)
1) take a pair of leggings/sweats/pants that do fit your toddler nicely to use as reference for length. The ones I use as reference here are a little short so I'm throwing in an extra bit. Don't forget to leave yourself a seam allowance, + waistband, when you measure. For these instrustions, add 'height of elastic x2' plus 3/4" for seam allowance.
You're measuring from under the waistband of the pair that you like, and then adding the above measurement.
I used nice thick sturdy pyjama bottom elastic I picked up at dollarama, because these pants from Joe had a waist like that and I liked the way they worked.
You want to mark on each side of the sleeve 1) the cutting line, which is the top of the waistband+hem measurement, and 2) the waist line, which is where the waist of your reference pants ended
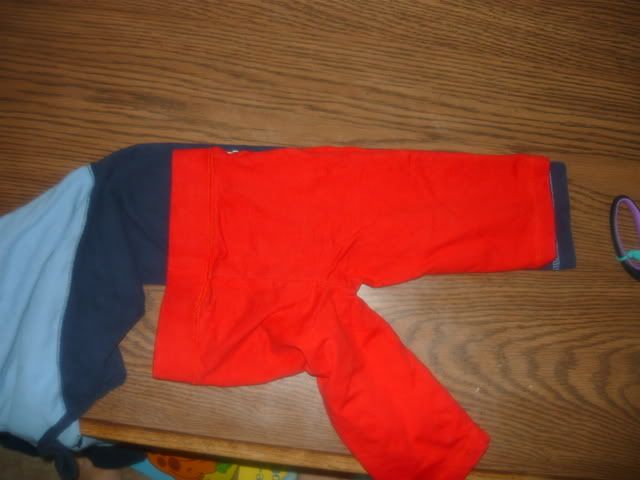
measure the middle/crotch seam on your fitting pair of leggings/pants and mark that on your sleeve-pants, from the lower (waist) mark and down. then (on the opposite side of the sleeve's seams) cut down to that line.
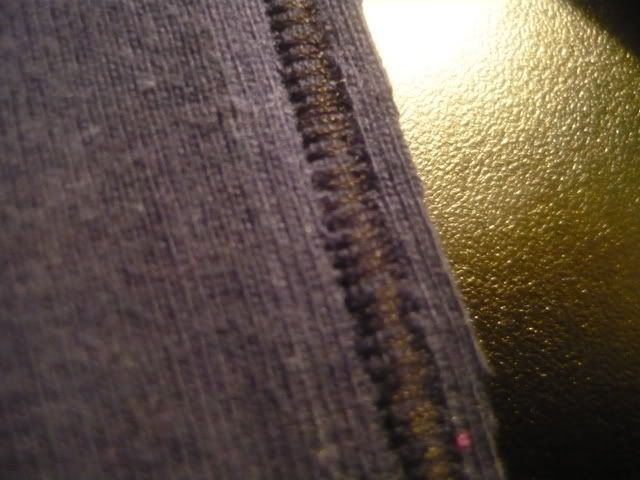
With right/out sides together, pin your two legging legs together. Then sew along the pinned line. If you have a serger, then bless your little heart, you know what to do. If you don't, use whatever stitch tends to be kindest to knits on your machine. If you're not sure, experiment!
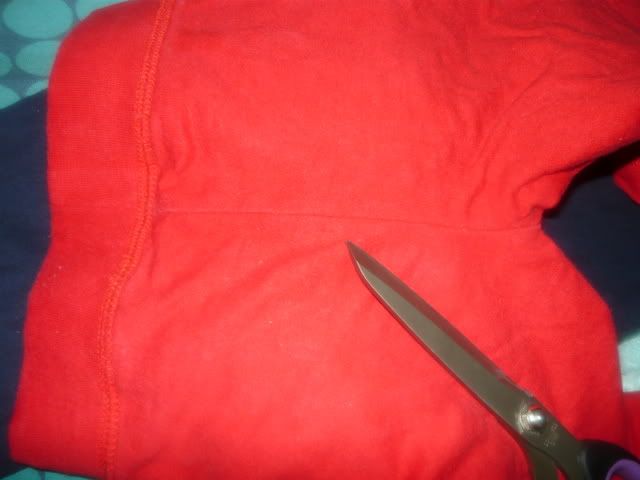
I used a nice fat ziggyzag. Then I trimmed it close. You finish your hem however you find works best, I decided to ziggyzag and trim but that's just me.
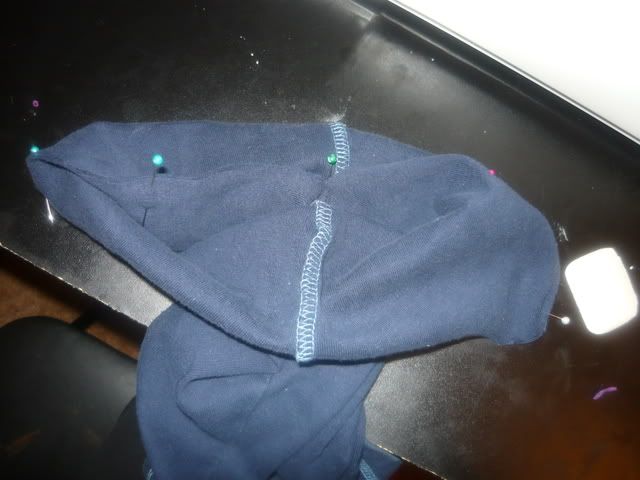
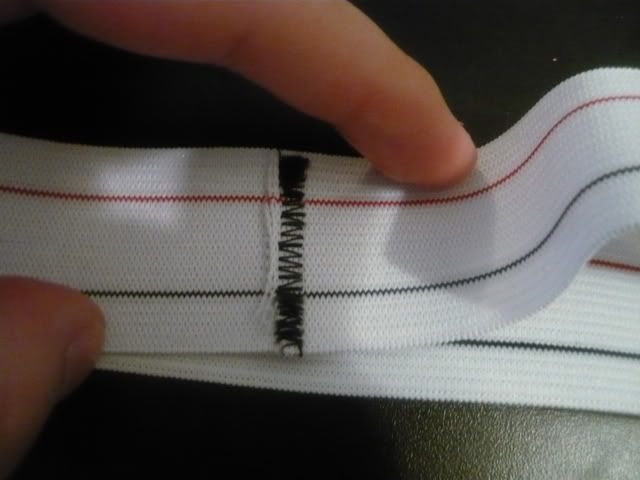
measure out your waistband on your little one. You want it to fit snugly. because the pj elastic can be pretty hardcore you don't want it to be too tight, just snug. Then pin and sew it together as shown. Be sure to actually measure on your toddler, and then once you sew it maybe go back and do it again.
(I did this for the tutorial when DD was sleeping and wound up with too big a waistband so now I have to take it in. But the tutorial still works, you can learn from my mistakes instead of just my triumphs alone. lol.)
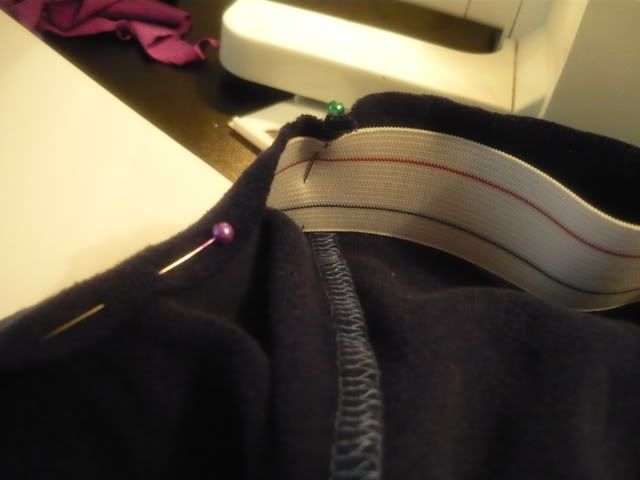
Okay, bear with me as I try to explain how to finish this garment. Firstly you want to turn your pants inside out so the wrong side is facing outwards.
1)Mark out the front/back/left side/ right side on the elastic, and then pin it to your pants accordingly. your pants will possibly be bigger than your elastic, depending on the shirt you used, but that is fine, just as long as you have it lined up evenly. You want to pin it to the pants about 3/4" from the rough edge.
2)FOLD the pants/elastic over towards the inside of the pants, so the elastic is completely covered by fabric. Go around and take your pins out from inside the fold and repin each pin, through both layers of fabric and the elastic. You've formed your elastic casing!
3) Put the zipper foot on your sewing machine to make your life easier (eh? eh?) and line the elastic up to the edge the same way you would a zipper (if you haven't done this before you could either google it or you could use a regular foot and just be extra careful.)
4)sew the elastic casing shut without sewing on the elastic, stretching the elastic so your fabric isn't bunching as you sew.
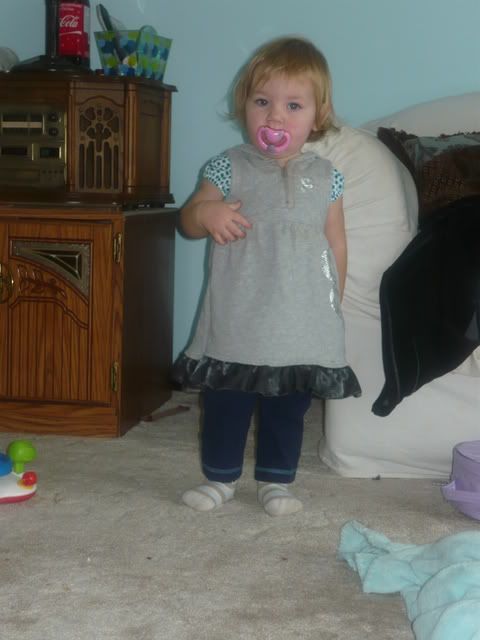
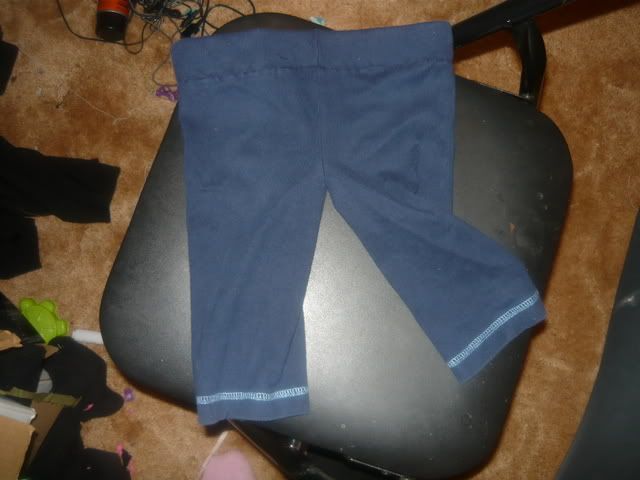
You're done! Hoorah! Now, go out to the cheapest thrift store around and buy a bunch more longsleeve shirts and make lots of leggings for under skirts/dresses/tunics. Baby, it's cold outside!
Cuffed Variation:
For the cuffed variation, the only thing you're doing differently is folding the cuffs over (and pressing them if need be) the desired amount before starting step 1. You could stitch the cuffs in place if you wanted, but I didn't, then I have the option of flipping them back down when she gets a little bigger. Flipped cuffs look really great when you use a thin sweater with fitted sleeves and a ribbed cuff!


Really cute!
ReplyDeleteOOOh great idea!
ReplyDeleteah, thanks.
ReplyDeleteStriped shirts make especially fun leggings!
Baby looks cute when she wearing a leggings. Thanks also for the tips on making a wonderful leggings for baby.
ReplyDeleteRecent blog:=- Super Sunglasses
That was advisable for the designers for having that tips. Thanks for sharing.
ReplyDeleteRecent blog:=- Supra Shoes
Very cute!
ReplyDeleteSadie@
nelliebugs-swaps.blogspot.com
I made mine here
ReplyDeletehttp://embendesigns.blogspot.com/2011/09/i-was-failed-to-make-ruffle-shirt.html
Thanks for sharing